
Overview:
Creating an engaging email survey is simple with Surveybox.ai ready-made templates. Surveys are a powerful way to gather audience feedback, and Surveybox.ai makes the process fast and beginner-friendly. You can get up and running in just a few minutes by following these key steps:
→ Choose from a variety of professionally designed templates: Whether you want customer satisfaction surveys, event feedback forms, or product evaluations, Surveybox.ai offers diverse options tailored to different goals.
→ Customize your survey effortlessly: Each template is fully editable. You can adjust questions, add your branding elements like logos and colors, and modify response options to suit your specific needs.
→ Optimize for email delivery: Templates are pre-formatted for smooth integration into email campaigns, ensuring your recipients have an easy and enjoyable experience responding on any device.
→ Leverage built-in best practices: Templates include proven question types and layouts designed to maximize response rates and data quality.
By using these templates from Surveybox.ai, you eliminate the guesswork of survey design and streamline your feedback collection process—all without needing prior experience in survey creation.
Creating a survey template with Surveybox.ai is simple and efficient. Here's how you can get started:
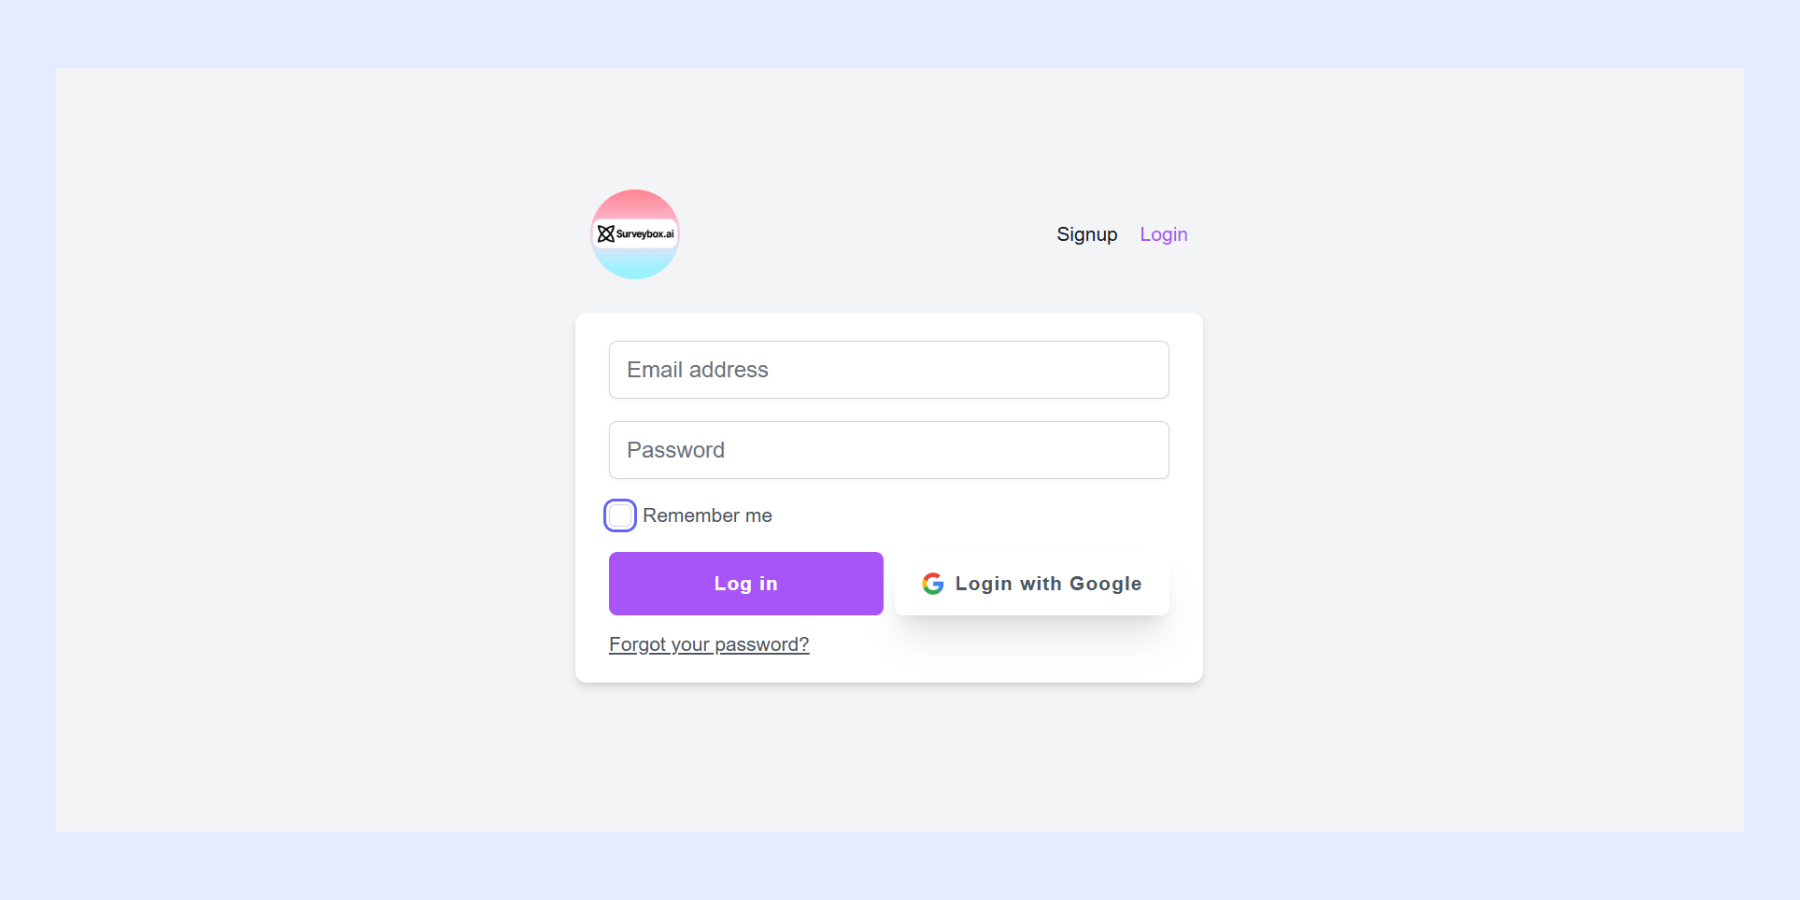
🎯 Step 1: Log into Surveybox.ai
Start by heading over to Surveybox.ai
→ Go to Surveybox.io and sign in with your credentials
→ Enter your email ID and password to access your dashboard
→ If you're new, sign up in under a minute it’s free to start
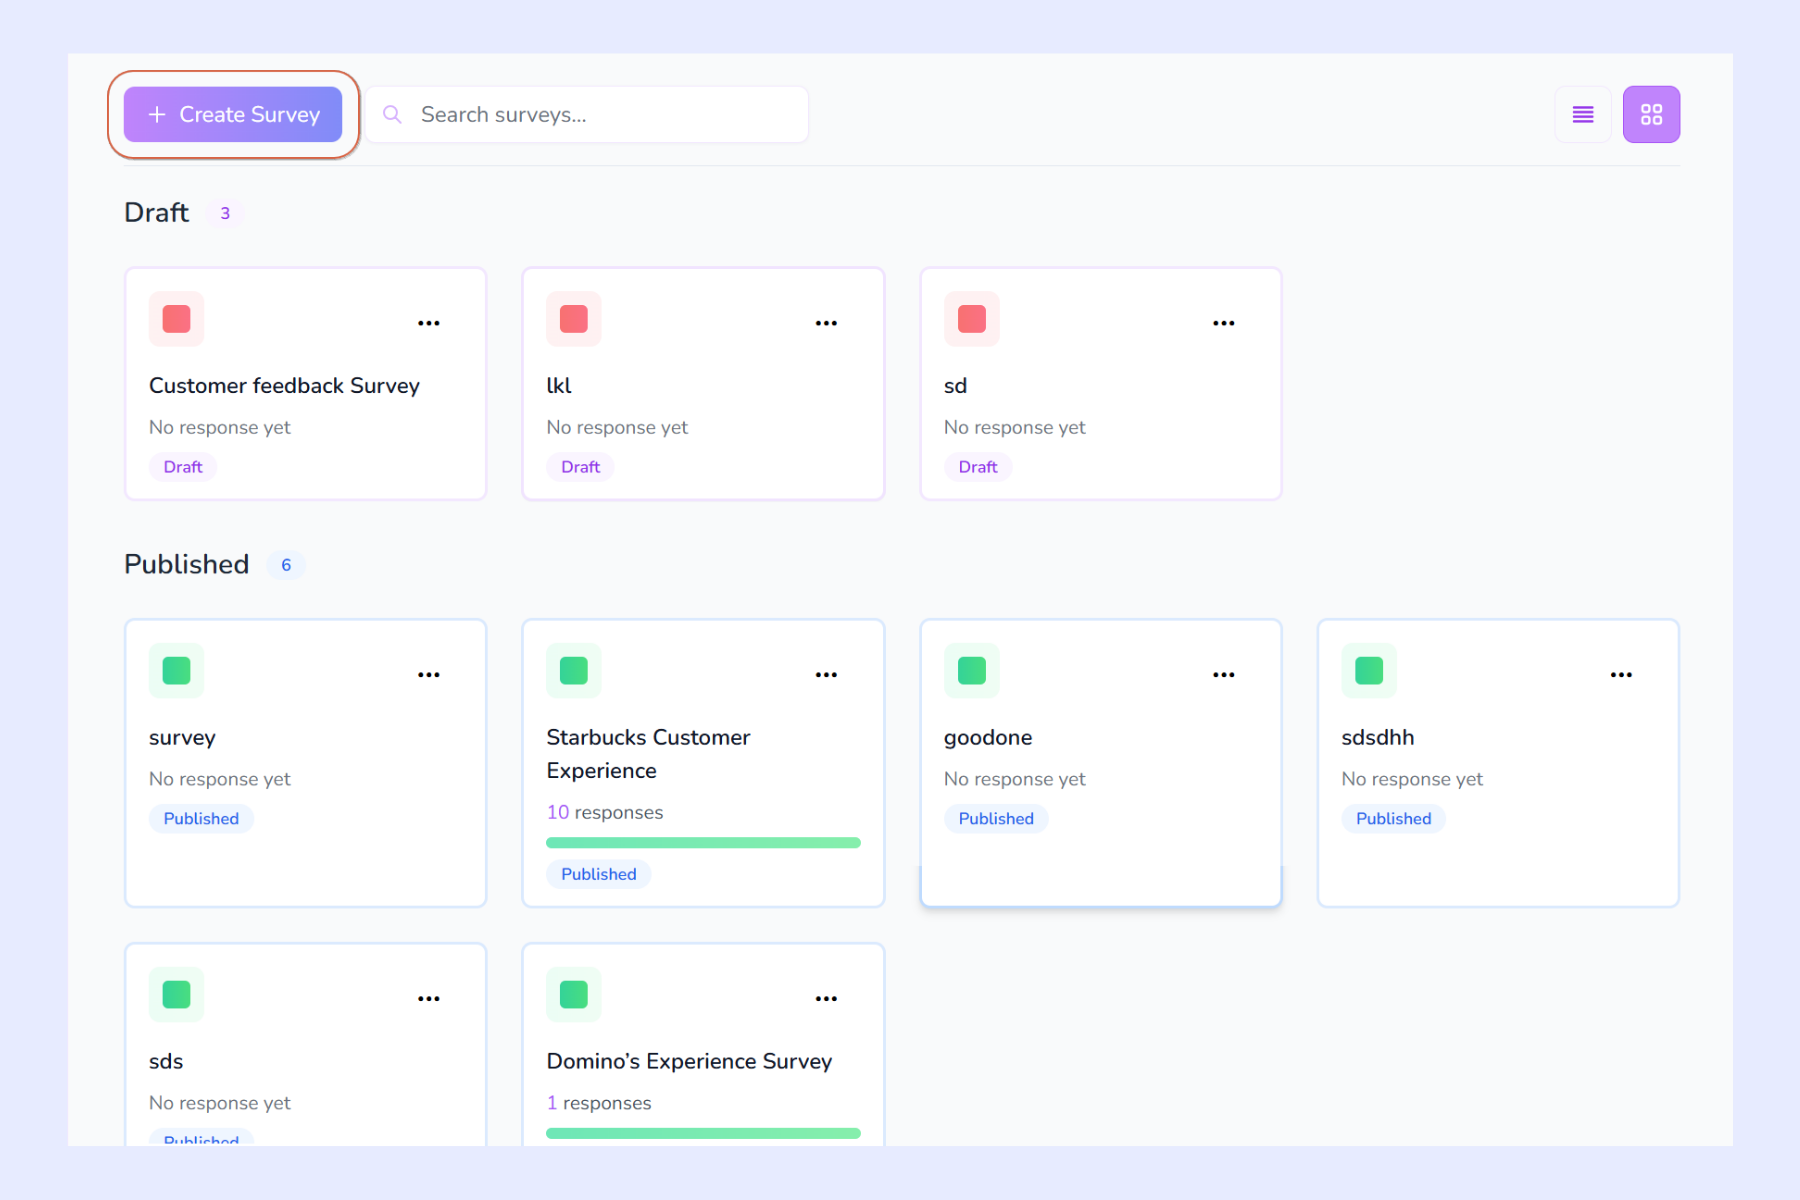
📝 Step 2: Click on Create Survey
Once you're inside your dashboard:
→ Look for the Create Survey button at the top right of the page
→ Click on it to begin creating your survey
You'll be taken to a page where you can choose between starting from scratch or using one of our ready-made templates
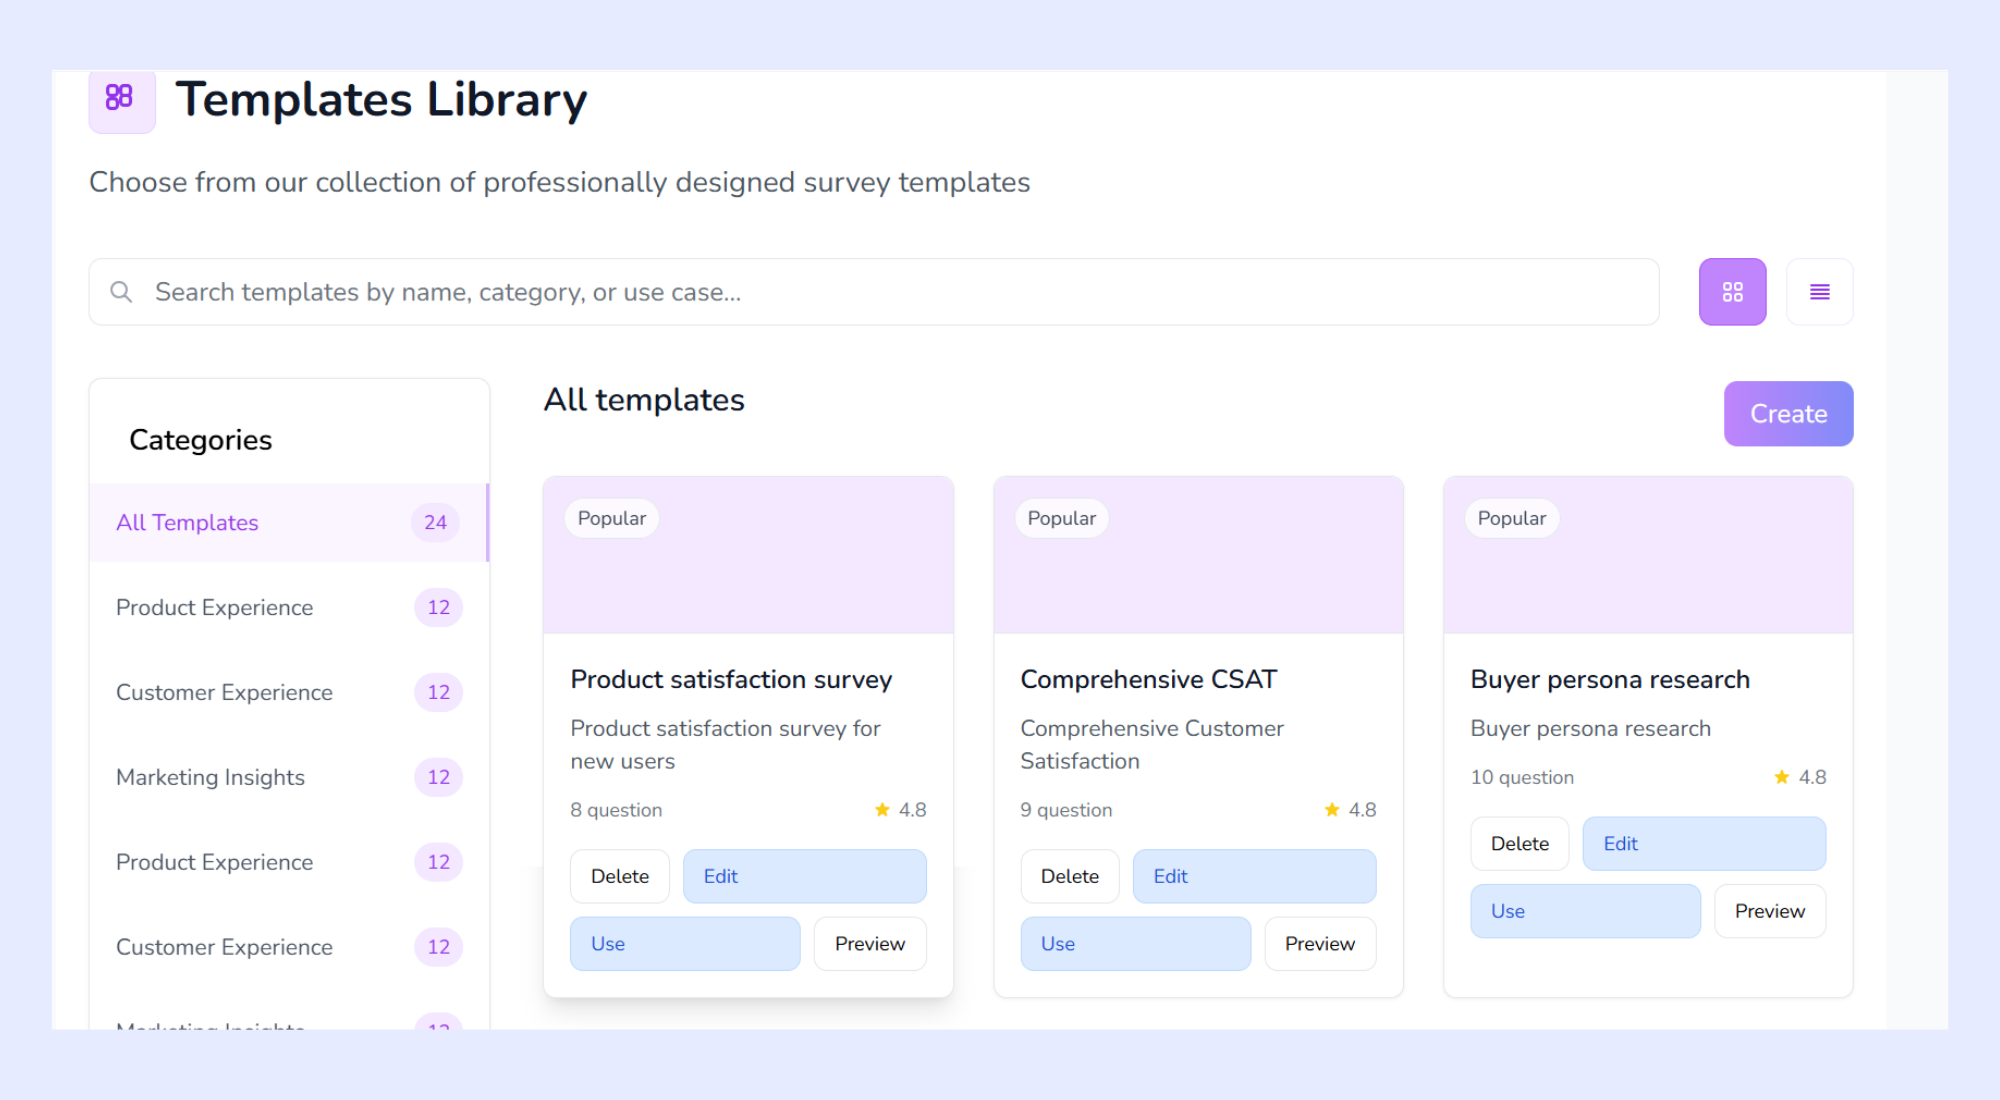
🎨 Step 3: Choose a Template
Surveybox.ai offers a range of survey templates designed for different use cases:
→ Customer Satisfaction (CSAT): Great for understanding overall customer experience.
→ Net Promoter Score (NPS): Measure customer loyalty and referrals.
→ Product Feedback: Gather insights on features, usability, and improvements.
→ Custom Survey: Build one from the ground up.
Hover over any template to get a quick preview or click “Use Template” to select and move forward.
🧠 Don’t worry templates are fully editable, so you can customize them however you like .
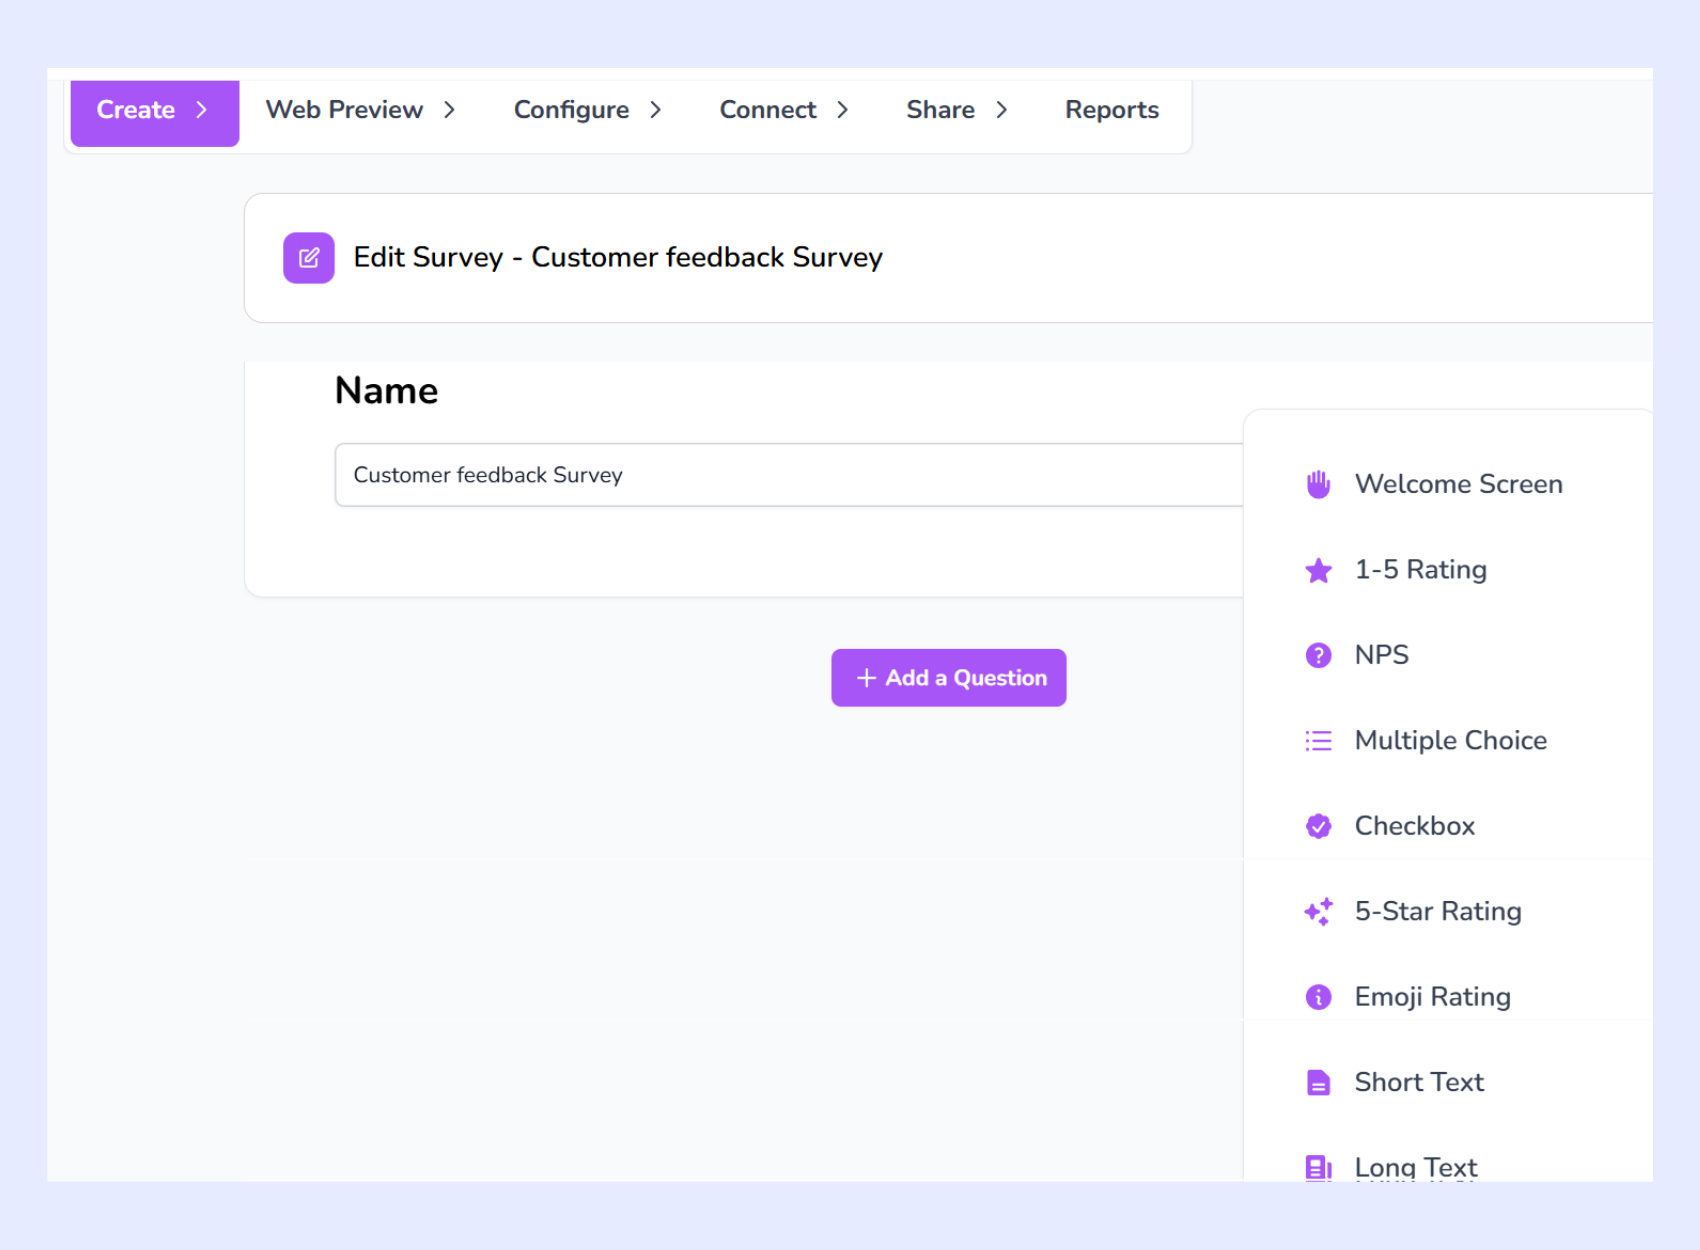
✏️ Step 4: Customize Your Survey
Now it’s time to make the survey your own:
→ Edit the survey title to match your purpose.
→ Click on any question to edit the text.
→ Add new questions from a variety of formats:
○ Multiple Choice
○ Star Rating
○ Text Input
○ Checkbox's
○ Emoji Rating ,etc.
→ Reorder questions easily using drag-and- drop.
→ Apply conditional logic (e.g., if a user selects "No", show a follow-up question).
💡 Make it conversational and focused to increase response rates.
⚙️ Step 5: Configure Survey Settings
This step is about control and personalization:
→ Set your survey duration by adding start and end dates
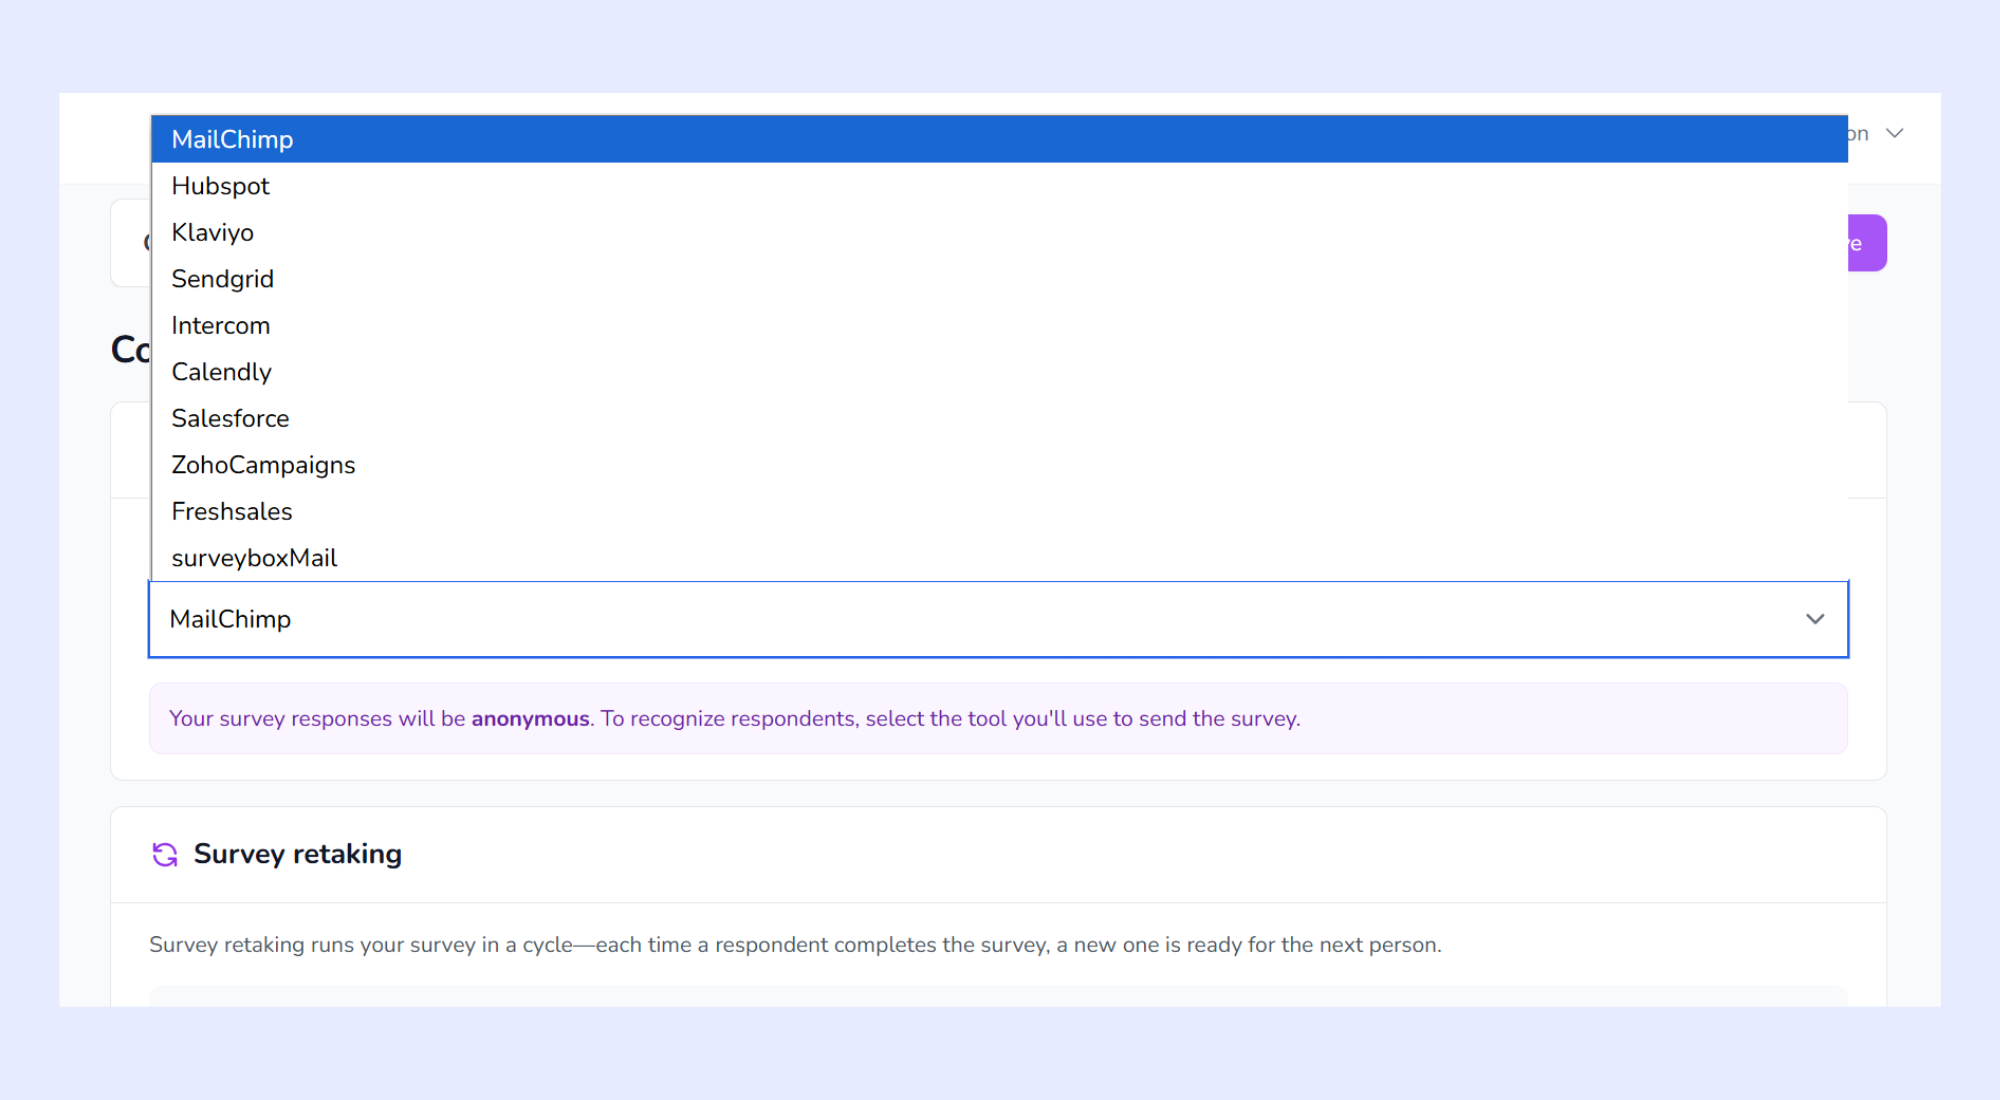
→ Choose your target audience: CRM leads from email contacts via Mailchimp, HubSpot, or Klaviyo ,Salesforce, Zoho Campaigns, or Freshwork etc
→ Decide if the survey should be anonymous or collect respondent info
→ Optionally, tag your survey with campaign names, or vendor details for tracking
🎯 The settings panel helps you align your survey with your campaign goals
🔔 Step 6: Set Up Notifications (Optional)
Want real-time alerts when someone submits a response?
→ Enable notifications within your dashboard
→ Choose how you want to be alerted:
→ Email alerts
→ Integrate with Slack, HubSpot, or email to receive instant updates
🔗 These alerts help you act on feedback quickly and improve response handling
📤 Step 7: Launch Your Survey
Time to send it out!
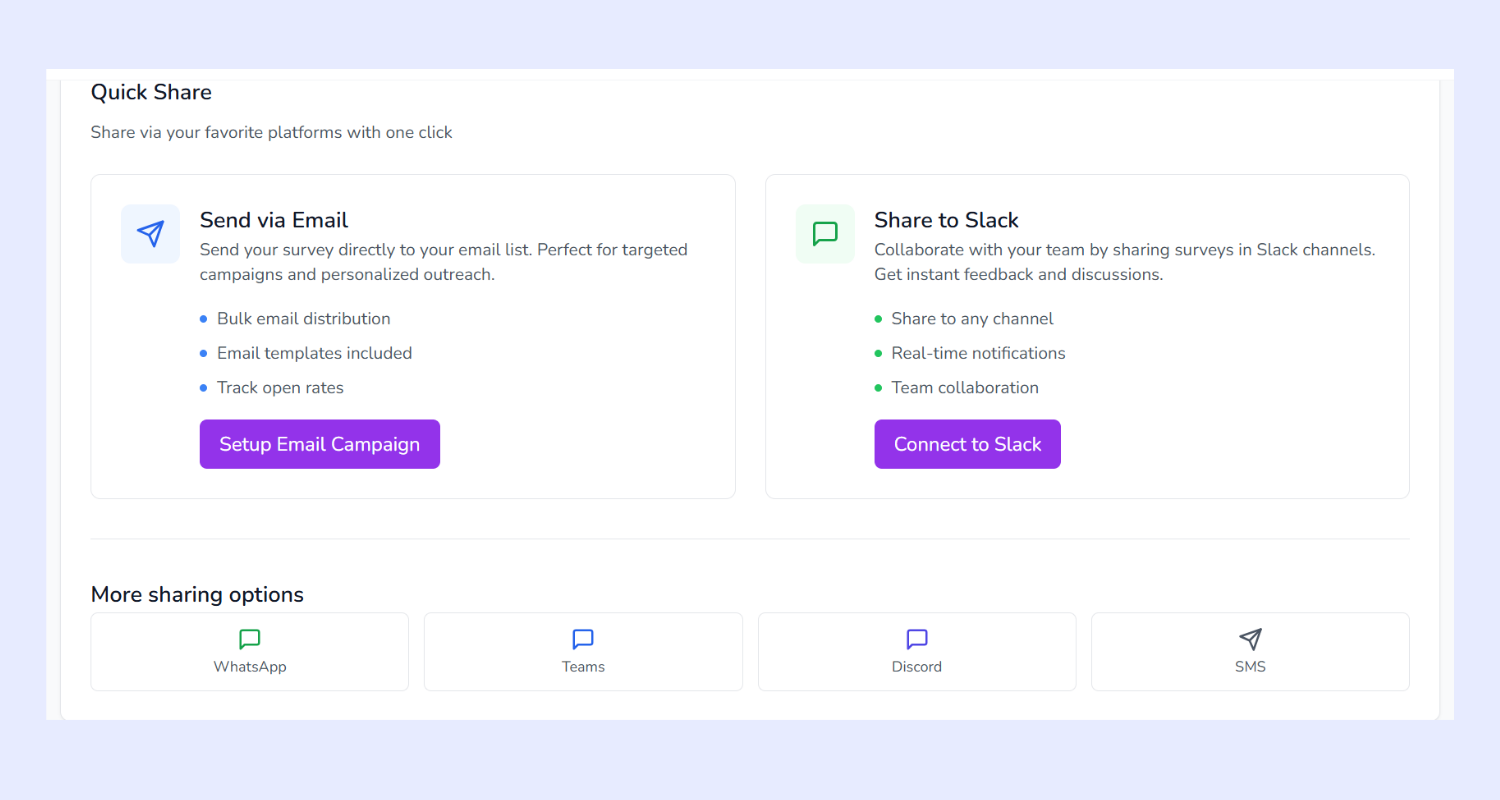
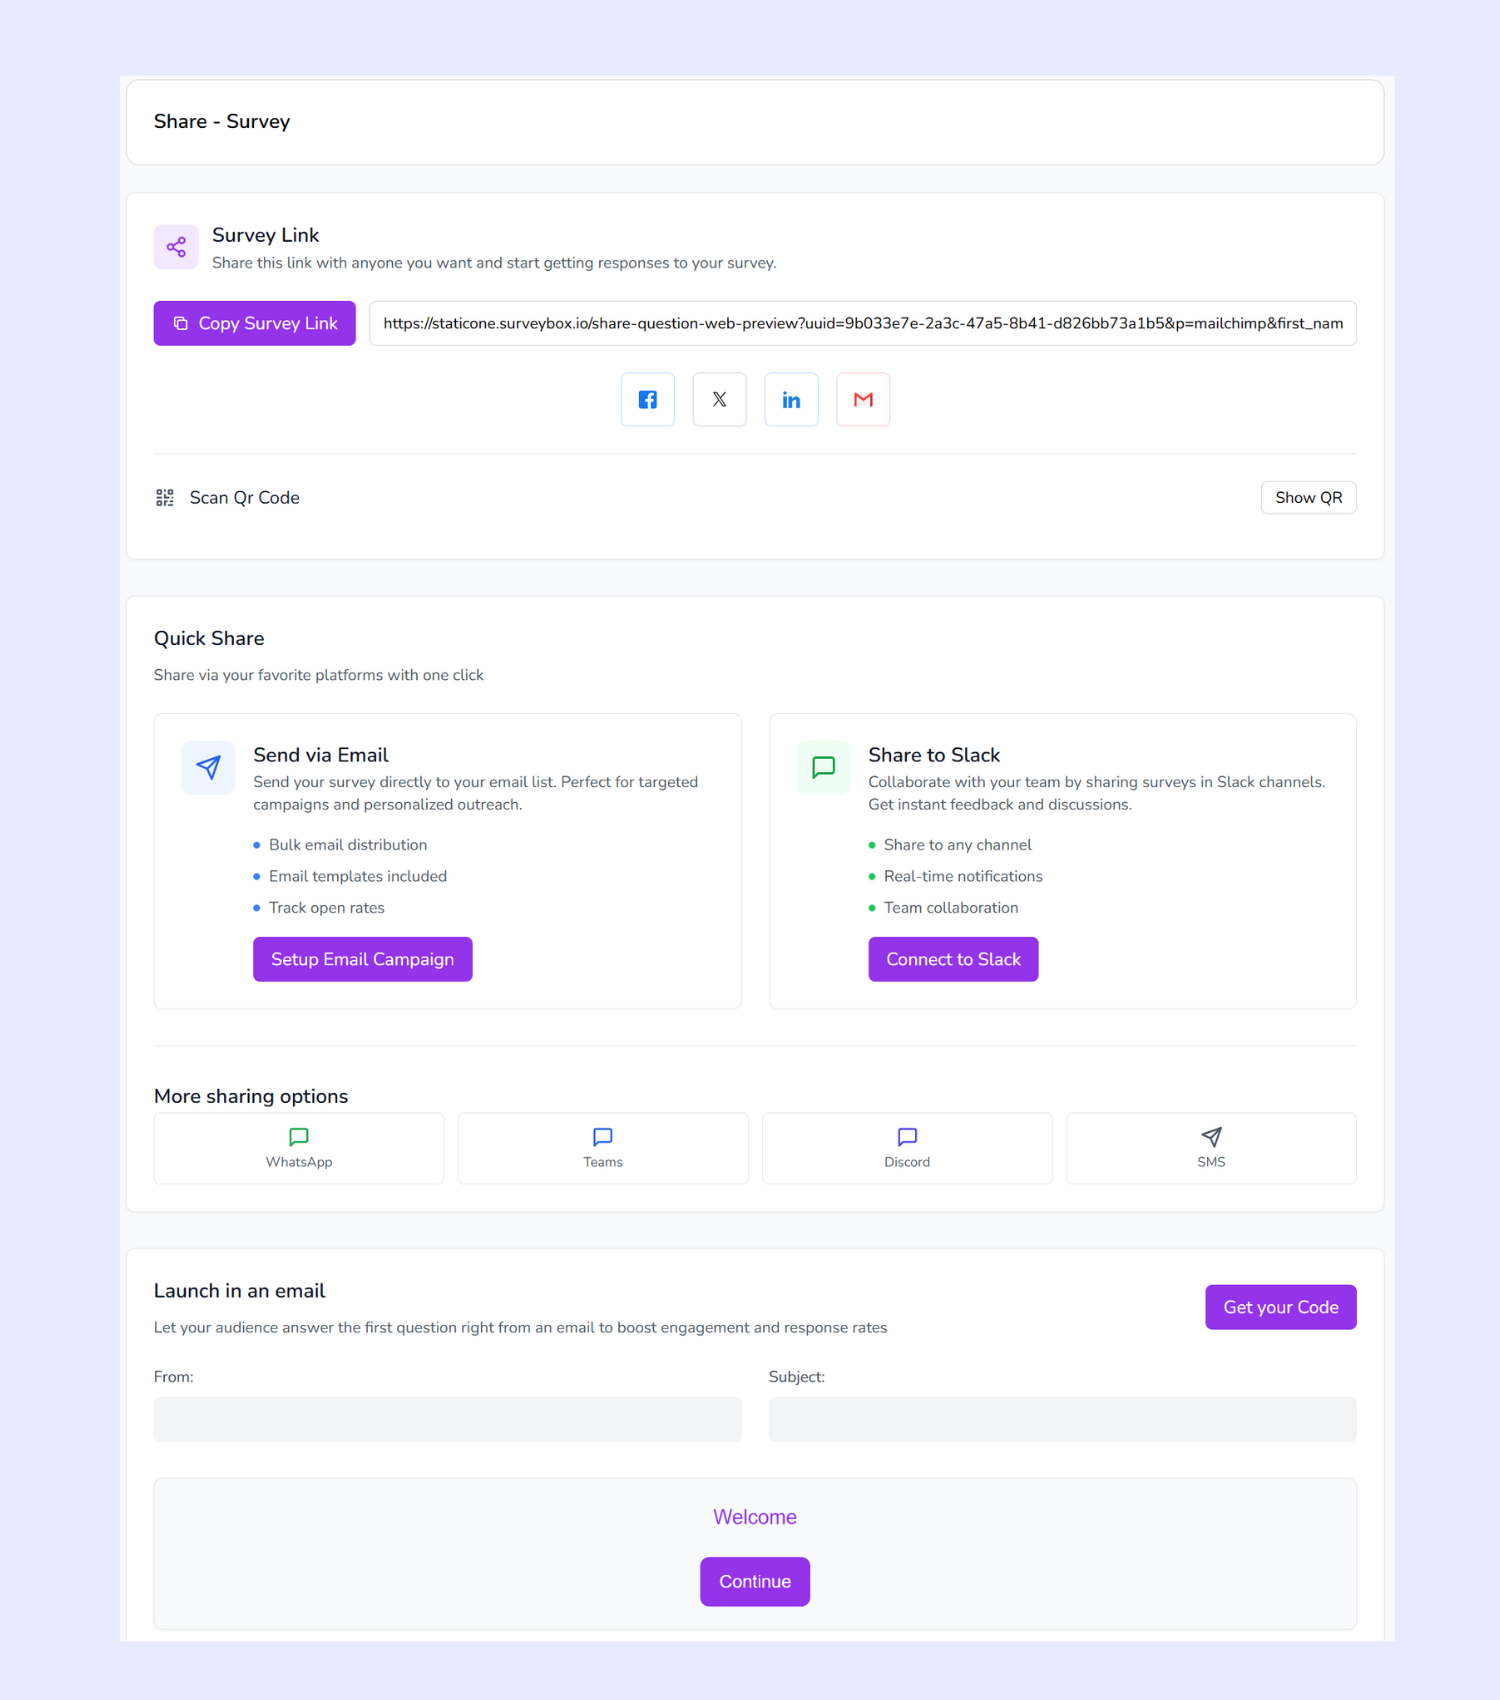
You have multiple distribution options:
→ Email Campaign – Use Surveybox.ai built-in email tool or integrate with platforms like Mailchimp, Klaviyo, or HubSpot
→ Shareable Link – Copy and paste it into messages, social media, or newsletters
→ QR Code – Download and print it or embed it on a poster or product
🚀 Choose the channel that suits your audience best for higher engagement
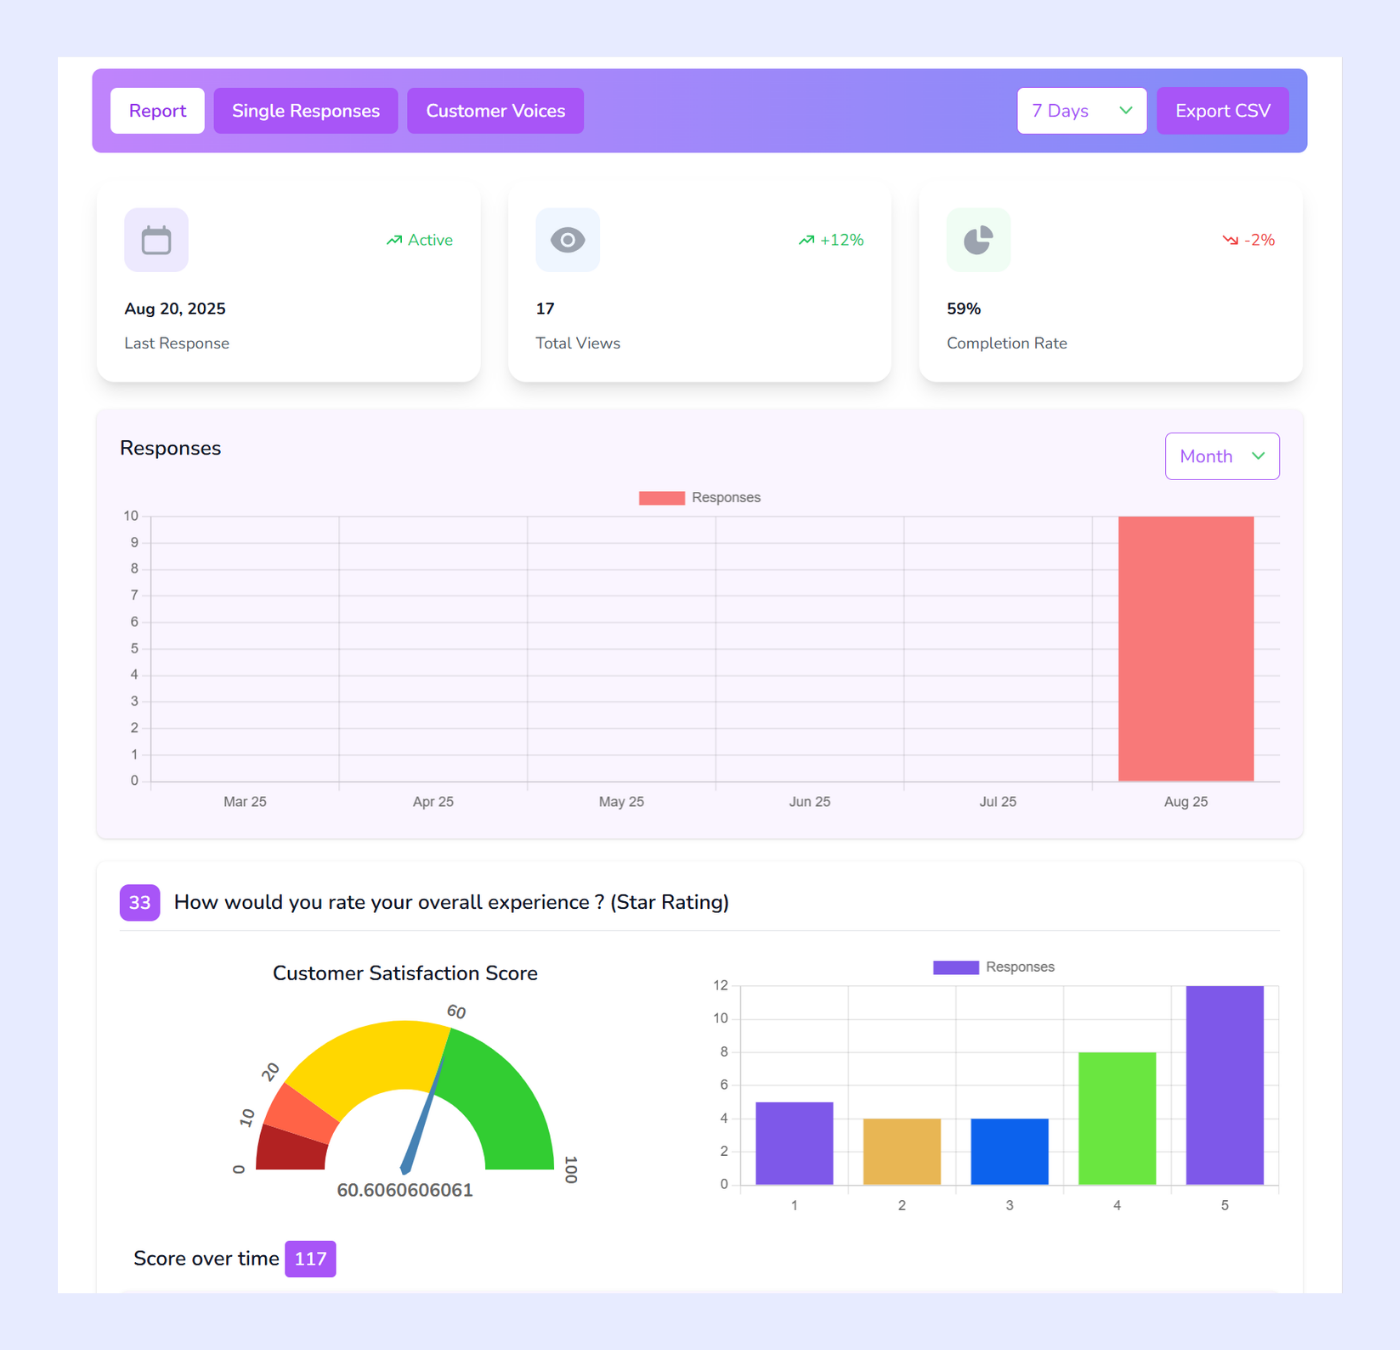
📊 Step 8: Monitor Responses & Analyze
Head over to the Reports tab to see live results
→ View visual reports: bar charts, pie charts, heat maps
→ View charts, filters, and individual responses
→ Export your data as an Excel or CSV file, or push results to Google Sheets, HubSpot, etc
📈 Use these insights to drive better decisions and actions.
🔁 Step 9: Duplicate, Refine & Repeat
Once your survey is complete, don’t start from scratch next time:
→ Click Duplicate to create a new version
→ Use previous data to optimize questions or structure
→ Compare results over time to track performance
🔄 Continuous iteration helps build better campaigns and smarter surveys.
Why Choose Surveybox.ai for Your Surveys
Surveybox.ai streamlines the entire survey process, empowering you to collect valuable data quickly and efficiently. Whether you’re a marketer, educator, or business owner, the platform is designed with your needs in mind
Key Features:
→ Customizable Templates:
○ Start with a professionally designed template or build your own from scratch. Tailor every element questions, branding, layout to fit your unique objectives
→ Drag-and-Drop Builder:
○ Add, remove, or reorder questions intuitively with a simple interface. No technical skills required
→ Automated Workflows:
○ Set up automatic notifications and follow-up emails to keep respondents engaged and ensure timely feedback
Powerful Analytics Tools
Real-Time Dashboards:
→ Instantly monitor survey responses as they are submitted. Dashboards update automatically, giving you immediate visibility into participation rates and answer distributions
→ Easily spot patterns or anomalies without waiting for manual data compilation
○ Dynamic Visual Reports: Quickly interpret complex datasets through a range of visualizations:
○ Bar Charts clearly illustrate comparisons between answer options
○ Pie Charts highlight proportional breakdowns for single-choice questions
○ Heat Maps reveal response intensity areas, helping you identify popular or problematic choices at a glance
→ Export these visuals directly for presentations or share interactive reports with stakeholders to streamline communication
Advanced Filtering & Segmentation:
→ Dive deeper by slicing your data using robust filters:
→ Segment results based on demographics such as age, location, or job title
→ Apply custom criteria like purchase history or engagement level to uncover granular insights unique to your business goals
→ Effortlessly compare different audience segments side-by-side to discover hidden trends and correlations
Seamless Integrations:
→ Connect effortlessly with popular tools like Mailchimp, Klaviyo, Google Sheets, and HubSpot
→ Export results in multiple formats for deeper analysis or sharing across teams
Benefits at a Glance:
→ Accelerate Decision-Making: Gather actionable insights rapidly to inform marketing strategies and increase campaign effectiveness maximizing ROI with evidence-based adjustments
→ Drive Product Innovation: Use authentic user input collected through targeted surveys to refine features, prioritize updates, and launch products that align with customer needs
→ Boost Customer Satisfaction: Implement continuous feedback loops that allow you to address pain points proactively and personalize experiences at scale
→ Build trust: By showing customers their opinions drive meaningful change within your organization
With Surveybox.ai, transforming responses into strategic action is just a few clicks away.
Conclusion:
Surveybox.ai makes creating surveys easy, fast, and effective. With customizable templates and powerful analytics, you can gather feedback, gain insights, and improve your strategy all in just a few clicks
👉Explore more at Surveybox.ai